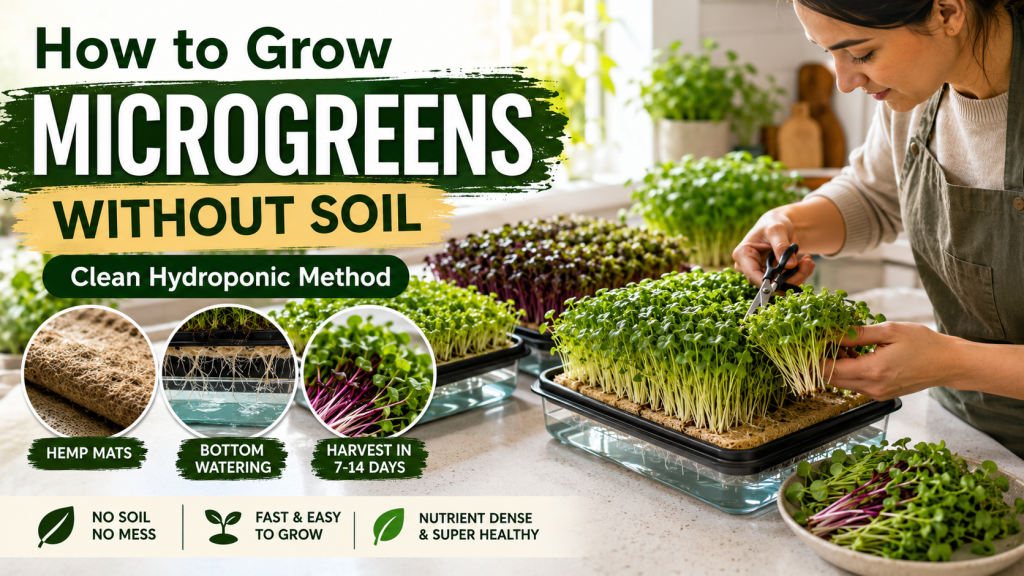
Learning how to grow microgreens indoors without soil is one of the most rewarding upgrades you can make to your indoor kitchen garden setup. For many indoor gardening enthusiasts, the traditional method of growing these nutrient-dense baby greens in seed-starting soil mixes feels incredibly discouraging due to the inevitable mess, loose dirt on kitchen counters, and the high risk of soil-borne fungal diseases like damping-off.
Fortunately, breaking away from traditional dirt is not only possible, but it is actually the preferred commercial method for producing pristine, restaurant-quality shoots. Because microgreens are harvested at the very first stage of true leaf development, they carry all the vital energy they need right inside the seed coat itself, requiring zero nutrient-rich soil to thrive during their short 7-to-10-day lifecycle.
By switching to a clean, soil-free hydroponic setup, you completely eliminate the dirt, slash the risk of pest infestations, and streamline your harvesting process down to a single clean cut. Here is your ultimate, beginner-friendly blueprint to growing fresh, vibrant microgreens indoors using soil-free mediums.
The Hydroponic Advantage: Why Skip the Soil?
Before setting up your trays, it helps to understand why a soilless growing medium is superior for indoor microgreen production:
- Absolute Cleanliness: There is no loose dirt to wash off your delicate greens during harvest time, meaning you can eat them straight from the tray.
- Flawless Moisture Balance: Soilless mats and pads hold moisture uniformly across the entire surface, preventing dry patches that stunt seed germination.
- Fungal Prevention: Soil contains natural microscopic organic matter that easily molds when kept constantly damp indoors. Soilless mediums remain structurally sterile.
1. Select Your Perfect Soil-Free Medium
To grow microgreens without dirt, you need an alternative foundation that can anchor the tiny plant roots and hold onto moisture without suffocating the seeds.
The Top Choices
- Hemp Growing Mats: Made from natural woven hemp fibers, these biodegradable mats are the perfect organic choice. They retain water beautifully and decompose cleanly after harvest.
- Coconut Coir Sheets: Derived from shredded coconut husks, coir pads provide an excellent, airy structural texture that allows tiny root hairs to breathe easily.
- Reusable Silicone Mesh: A highly cost-effective, zero-waste option. The roots slip directly through the tiny plastic or silicone grids straight into a shallow reservoir of water beneath.
2. Prepare and Sanitize Your Grow Trays
To avoid stagnation and mold outbreaks, your hardware setup must be pristine. You will need a dual-tray system: one top tray with fine drainage holes or a mesh bottom, and one solid bottom tray without holes to act as a water catch basin.
The Setup Process
- Clean both trays thoroughly using warm water and mild organic dish soap to strip away any lingering bacteria.
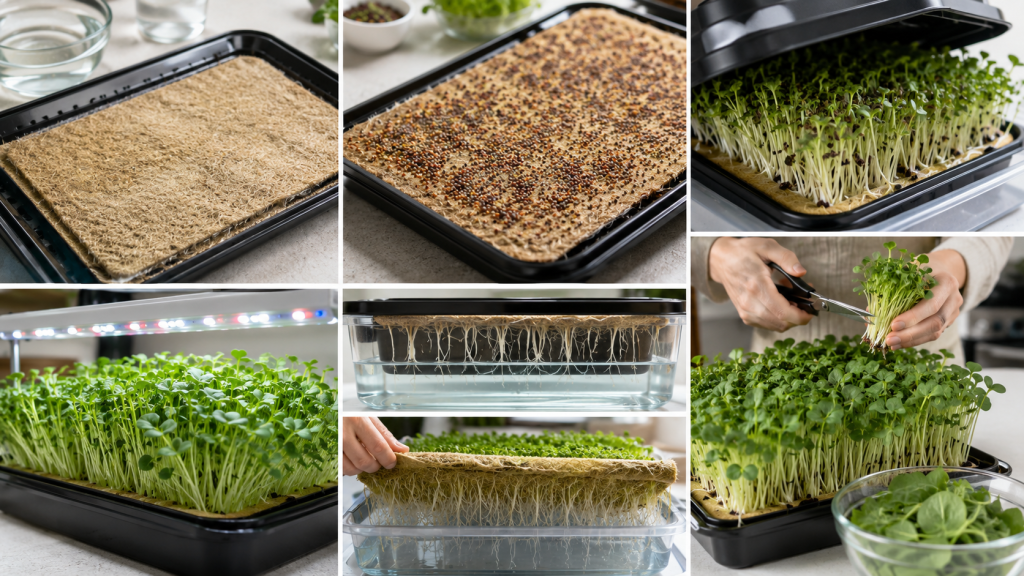
- Place your chosen hemp or coconut coir mat flat into the bottom of the perforated top tray.
- Pour fresh, filtered room-temperature water over the mat until it is completely saturated, then tilt the tray slightly to let any excess water drain off completely. The pad should feel like a wrung-out sponge—damp, but not pooling with deep standing water.
3. Measure and Density-Sow Your Microgreen Seeds
Sowing seeds on a flat mat requires a much tighter, more even distribution than planting out in a traditional outdoor garden bed. For beginners, sturdy varieties like Broccoli, Radish, Mustard, and Kale are the absolute best choices because they sprout rapidly and resist damp mold.
Sowing Steps
- Measure out about 1 to 2 tablespoons of seeds for a standard small grow tray.
- Gently sprinkle the seeds across the damp mat, aiming for a single, uniform layer where the seeds sit side-by-side but do not pile up or smother each other.
- Lightly mist the top of the newly sown seeds with a fine spray bottle filled with pure water to lock in initial germination moisture.
4. Initiate the Blackout Phase for Rapid Sprouting
Microgreen seeds require total darkness and a slight physical weight to mimic being buried underground. This environmental trick forces them to develop strong, deep root systems and stretch upwards evenly.
Creating the Blackout
- Place a solid, inverted tray or a piece of clean cardboard directly over the seeds to completely block out all room light.
- Place a small, lightweight object (like a clean ceramic coffee mug or a smooth stone) on top of the cover tray to press it down gently against the seeds.
- Keep the tray tucked away in a warm, dark corner of your kitchen or closet for 2 to 3 days. Do not disturb them except for a quick daily peek to ensure the mat remains damp.
5. Transition Your Sprouts to Bright Indoor Light
By day 3 or 4, you will lift the cover tray to find a dense forest of pale, yellowish-white sprouts that have successfully pushed their tiny roots straight through your mat or mesh screen. It is now time to trigger photosynthesis.
Bringing in the Light
- Move your uncovered tray into a location that receives bright, indirect sunlight, or position it directly underneath a dedicated T5 LED grow light fixture.
- Within 12 to 24 hours of exposure to light, the pale sprouts will miraculously transform into a rich, deep, vibrant green color as they begin generating chlorophyll.
- Keep your indoor grow room temperature stable between 18°C and 22°C to ensure steady, healthy growth parameters.
6. Implement Bottom-Watering to Prevent Foliage Rot
Once your microgreens are exposed to light, you must never spray them from above with a water bottle again. Spraying moisture directly onto dense, crowded baby leaves traps humid air, which instantly invites deadly white mold colonies to ruin your crop.
The Bottom-Watering Method
- Lift the top perforated tray slightly and pour roughly half a cup of water directly into the solid bottom tray.
- Lower the top tray back down into the basin. The soilless mat will automatically absorb the water upward from the bottom via capillary action, keeping the roots hydrated while keeping the delicate upper leaves completely dry and clean.
- Check the bottom basin daily, adding just enough water to keep the mat damp while ensuring the roots never drown in a deep puddle.
7. Harvest Your Clean, Crisp Microgreens
Your soil-free microgreens are ready for your dinner plate roughly 7 to 10 days after sowing, or as soon as they stand about 2 to 3 inches tall and open their very first pair of “cotyledon” leaves.
Harvesting Technique
- Hold a small clump of the mature green shoots gently with one hand.
- Take a pair of sharp, sanitized kitchen shears and snip the stems cleanly about half an inch above the surface of your growing mat.
- Since there is zero messy soil or grit clinging to the stems, your harvested greens are perfectly clean and ready to be thrown directly into your salads, sandwiches, or smoothies immediately!
Conclusion
Mastering how to grow microgreens indoors without soil is the cleanest, fastest, and most modern approach to enjoying fresh homegrown produce year-round. By choosing a high-quality hemp or coir mat, respecting the dark blackout phase, and relying strictly on bottom-watering, you can easily bypass the traditional mess of dirt gardening altogether. This clean hydroponic method ensures your kitchen counters stay immaculate while providing a continuous, reliable harvest of vibrant, healthy, and nutrient-packed greens for your family.
For a deeper look at timing and technique, see our professional microgreens guide. Choosing the best microgreens seeds will also make each tray more reliable. If you want to explore this method further, start with our guide to hydroponics for beginners.
Frequently Asked Questions
1. Can I reuse my hemp or coconut coir mats for a second batch of microgreens?
No. Once you harvest your microgreens, the extensive root network remains completely embedded inside the organic fibers of the mat. Trying to reuse it will lead to immediate root decay and severe mold issues. You should compost the used mat and start fresh with a new one.
2. Why do my soil-free microgreens have tiny white fuzzy hairs on the roots?
Do not panic! Those tiny white fuzzy structures are perfectly healthy microscopic root hairs, not mold. They develop as the young seeds actively stretch out to absorb moisture from the damp mat. You can tell they are root hairs because they grow exclusively on the root stem and disappear once you water the tray.
3. Do I need to add liquid fertilizer to the water when growing without soil?
Generally, no. Because microgreens are harvested so incredibly early in their life cycle, they rely entirely on the natural nutrients stored inside the seed itself. Plain, filtered tap water is more than enough for a successful harvest. Only add a weak organic hydroponic fertilizer if you are growing long-term varieties like basil or amaranth.
4. How do I stop mold from destroying my soil-free microgreens?
The best way to prevent mold is to ensure excellent air circulation around your growing trays. Avoid over-sowing your seeds too densely, run a small household fan nearby on a low setting to keep the air moving, and always use the bottom-watering method to keep the top foliage completely dry.
5. Can I grow microgreens without soil using regular paper towels?
Yes, you can use unbleached, thick paper towels as a temporary DIY solution, but they are not ideal. Paper towels dry out incredibly fast compared to thick hemp or coconut coir mats, meaning you will have to check the moisture levels multiple times a day to prevent your seeds from drying out and dying.